
I choose the savings! {squeals of delight!}
I know that most people recommend having a 3" zipper binder, but I decided to start out with a regular 2" one. Although Krazy Coupon Lady recommends you get 4-6 copies of the Sunday paper, I have also read that you should get as many copies as there are members of your family. That seems a bit more reasonable to me for three reasons:
I wish we had more storage room, but in our current situation, a small stockpile is going to have to do. I'm still not sure whether we will get 2 or 3 copies of the paper, but let's move on to the storage - {The Coupon Binder} !- We don't have kids
- We live in an apartment = limited storage
- It takes us a long time to go through most products

I bought my binder at Staples. I read that some people had trouble with Wal-Mart workers thinking that they were stealing a binder. I assumed that if it says STAPLES on the back, they can't say I'm stealing it from them! I like that it's pretty and sturdy all at the same time.
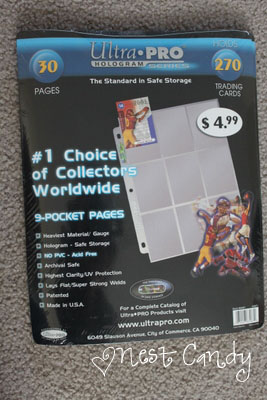
I went to K-Mart to get my baseball card pocket sheets. Staples were $3.99 for 10. I got 30 heavy duty ones at K-Mart for $4.99. I bought two packages of them.
I also bought a package of 4X6 page refills from Wal-Mart. --Warning-- these are for a larger album style binder. They were too long for my binder and I had to punch new holes and cut an edge off. I only needed a couple, so this didn't bother me. If you want a lot of pages in this style, the Wal-Mart ones are probably not for you.

At K-Mart I also bought a small calculator to put in my binder. I still need to purchase a zipper pouch to store it in.

The first ting you see when you open my binder is a stack of white envelopes in the left pocket. These envelopes are where I will keep my store coupons. These are usually only good for a week, so the envelopes work just fine. I don't see any point in putting them in baseball slots just for a week.

The envelopes I have are:
- Albertsons
- Safeway
- K-Mart
- Target
- Walgreens
- Rite-Aid
I didn't include an envelope for Wal-Mart because they don't usually send out store coupons. I don't have a Target, Walgreens, or Rite-Aid where I live, but if I drive about 45 minutes I can access them. I never know when I might be making a trip, so it's always good to have their coupons and promotions with me, just in case.
The first page in my binder is a 4x6 picture sheet. I put this here as a "catch all" page. Whenever I'm in the store and I want to use one of my coupons, I will pull it from its slot and put it in the big pocket up front. That way, when I get to the register, all the coupons I want to use are in one place!
The first page in my binder is a 4x6 picture sheet. I put this here as a "catch all" page. Whenever I'm in the store and I want to use one of my coupons, I will pull it from its slot and put it in the big pocket up front. That way, when I get to the register, all the coupons I want to use are in one place!
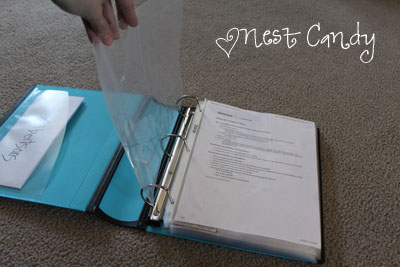
The next thing in my binder is a section filled with store coupon policies. I have several regular sheet protectors to put these in. The one in the front is Wal-Mart's coupon policy. It is a good idea to have these with you in case there are any misunderstandings or confusions with the cashier. Many of them do not even know the store even has an official coupon policy! I know that Wal-Mart has a reputation for not knowing their own coupon policy, so I keep that one front and center for easy reference.

Next, you get to the {Coupons}! Unfortunately, as you can see in the picture below, my tab dividers ended up being too short to really do their job. They will have to work for now, but I will probably get different ones in the future. Since I'm just starting with coupons and I won't have too many for a while, I decided to stay simple with my categories.


- Food
- Beverages
- Snacks & Sweets
- Health & Beauty
- Household Items
- Pets
- Misc.
- Rebates
 As you can see, the coupons fit nicely into the baseball card slots. I had to fold a few of mine, but as long as you can see the item and the expiration date, you should be good to go.
 For over-sized coupons (such as those printed online) that are not easily folded, I added a regular page protector to the back of every section. Here I simply store these large coupons in a way that I can see all the important details.
In the back I have my rebates section. I added another big 4x6 picture page to this section to hold big receipts and papers. I also added regular page protectors to hold any submitted rebate receipts, such as the one I printed from a Staples rebate yesterday.


And that's my {Binder}!
I still haven't taken this baby into the store with me, and I'll admit, I'm a bit nervous. Once again, it's that pride issue, but I am a firm believer in saving money on necessities so you can splurge on the good stuff! Everyone should afford to have fun! Tell me what you think in the comments below. Do you have any tips, suggestions, stories etc. about your couponing experience?


1 comment:
Thank you for posting this! I like how you organized your binder and the tips are very good. I'm just getting started and your ideas are very good!
Post a Comment